
I was approached by one of my favorite clients to help remodel and fully furnish a lake house they were about to purchase on Lake Conroe. This house was luxurious in its day but was dated. It was just begging for someone to make it pretty again. Starting with awesome bones and adding in a super talented team, I am thrilled to show you it’s transformation! Wyrick Residential Design did the plan design, Jameson Custom Homes did the remodel, Duckworth Interiors provided the construction selections and full interior, and IronPaws by Anthony Billingsley made all of the custom ironwork (Stairs and Wine Room). The beautiful after photos are brought to you by Grant Duckworth Photography.
These dream clients gave me FREE REIGN to do whatever I wanted to this lake house! Yep, you heard me. I mean any light fixture, tile, plumbing, paint, wallpaper, furniture, art, you name it. Didn’t even have to ask! So, needless to say, I had a LOT of fun on this project! Let’s start the tour…
The exterior…

Front Elevation: Before

Front Elevation: After
The exterior really didn’t need much. We painted the brick, replaced the front doors and exterior lighting, added some shutters, and spruced up the landscaping.

Front Elevation: Before
It always amazes me what a fresh coat of paint can do!

Front Elevation: After

Rear Elevation: Before
In the back, we removed the balcony and added a huge covered patio, outdoor fireplace, metal roof accent, and gigantic windows to maximize that stunning view!

Rear Elevation: Before

Pool: Before
The gorgeous pool was already there but had a lanai around it. The home owners wanted the lanai taken down, and afterwards I was SO surprised at how much closer the pool felt to the lake.

Pool: After
Let’s head inside and take a look at the old foyer! I told you, it was begging for someone to make it pretty again. It’s hard to see here but there is a step down from the foyer to the main living area. Because we wanted to make this all one level, the staircase had to be removed and rebuilt…

Foyer: Before
Doing so allowed us to bring in my childhood friend and very talented metal artisan, Anthony Billingsley (Iron Paws by Anthony Billingsley) to create a custom staircase that turned out to be such a stunning sight when you walk in the door!

Foyer: After
I love that we got to remove the wall under the stairs to allow the staircase to float. As you can see, Anthony is extremely talented!

Foyer: After
I don’t have a before picture of the next room, but opposite of the staircase was a formal dining room. My clients aren’t really formal kind of people and wanting to maximize the amount of bedrooms in the home, they decided to close this room in and make it a second master on the first floor. We also stole some space from the laundry room to add an en suite bath.

Foyer: Before (Entrance to formal dining on right)

Bedroom: After
You guys, I just love this bedroom so much! We chose a natural grasscloth for the walls, Tommy Bahama banana leaf drapery, and some blue accents.

Bedroom: After

Bedroom: After

Bedroom: After
Now let’s head into the main living area, there’s lots to see here! Here’s our casual dining area before…

Casual Dining: Before
I mean, such a transformation! So here, we replaced the windows with a huge butted glass window. We dressed the window with an operable sheer drape for the occasional need to filter the sunlight. We added these great light fixtures and of course new flooring, trim and paint throughout the home.

Casual Dining: After
Previously, there was an awkward brick fireplace where you see the built-in now. Removing the fireplace allowed for more storage, a dining serving area, and really lightened up the room.

Casual Dining: After
Adjacent to the causal dining area is where I think you’ll see the biggest transformation! First of all, just to the right in the photo below was a second stair case which we eliminated. Also, notice the balcony above, where the upstairs game room overlooks the family room. I had to do lots of persuading, but I finally convinced everyone involved to extend the second story all the way to the rear elevation. This achieved so many things… it closed off the game room so that all of the laughter, fun, and games being had on the second floor would no longer spill over onto the first floor. Entertaining in both areas could now happen simultaneously without interruption. It also added a lot of square footage to the second floor, which we put to good use! This is a great example of why you need a designer in your corner, advocating on your behalf!

Family Room & Bar: Before

Family Room & Bar: After

Family Room & Bar: After

Family Room & Bar: After

Family Room: After
Here’s another view…

Family Room: Before

Family Room: After

Family Room: After
Let’s take a closer look at the bar reno that I’m sure you’re curious about. This was an L-shaped bar originally and the bar and second staircase really separated the family room from the kitchen and casual dining. By removing this and the staircase we were able to create an open living space. As I’ve gotten to know my clients, I’ve learned how important wine is to them and I really wanted to help create a special way to feature their collection and love of wine…
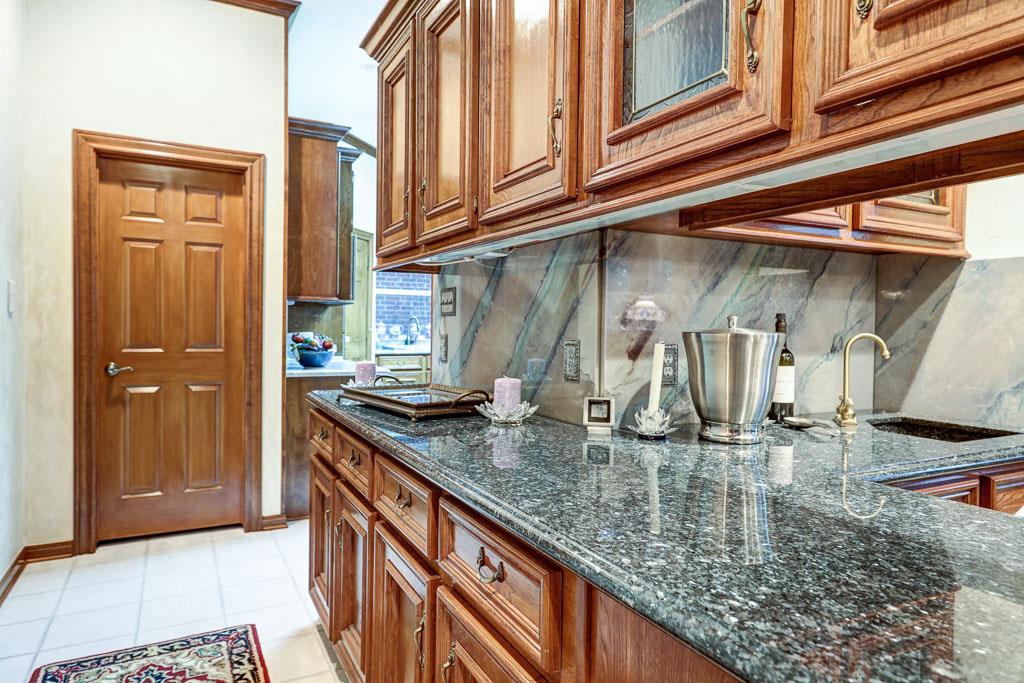
Bar: Before

Bar: After
This is where Anthony’s artistry came into play again! I really wanted to create a focal point and “jewelry box” in the space, and Anthony was able to bring that vision to life. I found an amazing glass tile for the back wall of the wine room, and I find that it really draws your attention into the room. Anthony lined the walls with metal shelves for display. The wall on the right end features bottle storage, stem ware holders, under counter wine coolers, and even back lighting!

Bar: After

Bar: After
The bar here is the perfect place for tastings, and it’s always OPEN!
Let’s turn our attention to the kitchen! We really did a complete overhaul in here! We said bye bye to the fluorescent light box and put in all new cabinets, appliances, countertops, and backsplash!

Kitchen: Before

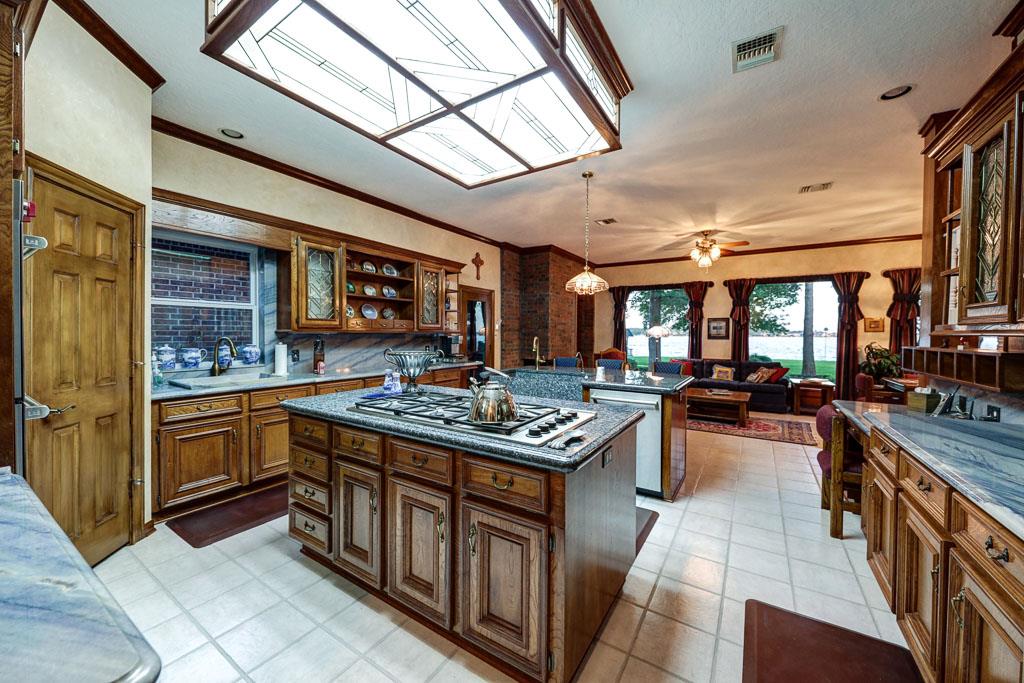
Kitchen: After
We relocated the cooktop to the back wall from the island. This allowed us to build this beautiful hood and give the kitchen a focal point. We also eliminated the fur down and took the cabinets to the ceiling. This fish scale back splash was just perfect for the lake house, so it was worth the splurge!

Kitchen: After
Notice we did need to remove the window there but the view was only of the garage! You can also see a peek of the brick fireplace in the casual dining that we removed…
Kitchen & Casual Dining: Before
We ended up changing the direction that the islands were facing before. Now they run parallel to the hood wall.

Kitchen & Casual Dining: After
I really, really love lighting… so you can imagine how happy these 4 amazing island pendants make me!!! In Texas we say, “Go big or go home”, and I really like to put that into practice. I go big!

Kitchen & Casual Dining: After
If you turn left before you get to the refrigerator, you’ll come to a hallway that leads to the laundry room and powder bath. I don’t have before pics of either, unfortunately. First up, the laundry room. I took a risk here and chose this blue for the cabinets, but I just love how it turned out!

Laundry Room: After
And here’s the powder…We added shiplap, a custom vanity, and some cute fixtures.

Powder: After
Before we head upstairs, we’ll check out the last space on the first floor, the master suite!

Master Bedroom: Before
Here we added shiplap to the bed wall and the room got a coat of paint and new flooring. I really wanted a fabulous bed, and this one was just perfect! The “lake house” pillow is by my friend and rock start business owner, Emily. You can go see her at The Neutral Nest in Tomball, TX.

Master Bedroom: After
When you need an accent table but want to keep things light, lucite is always a good choice…

Master Bedroom: After
Now let’s check out the en suite bath… granite, granite everywhere!

Master Bathroom: Before
This shower was tiny, tiny!! So we decided to remove the tub and make a huge walk-in shower instead. I get asked this question a lot in terms of resale value, people always want my opinion on whether it’s okay to remove a master tub. I like to leave one bath tub in a home, primarily for bathing children. And in this case the pool also has a spa, so if relaxation and muscle therapy is needed it can be found there. In these cases, I don’t miss a tub. I think a prospective home buyer is going to use a shower the majority of the time, and if they’ll be getting a large one, that’s a plus!

Master Bathroom: Before

Master Bathroom: After
You’ll notice we squared up the sink walls… there was no reason for the angles, ha! New cabinets, fixtures and finishes here…

Master Bathroom: After
Let’s head upstairs where we have a game room, theatre, bunk room, 4 bedrooms, and 2 Jack and Jill baths.
Upstairs Landing: Before
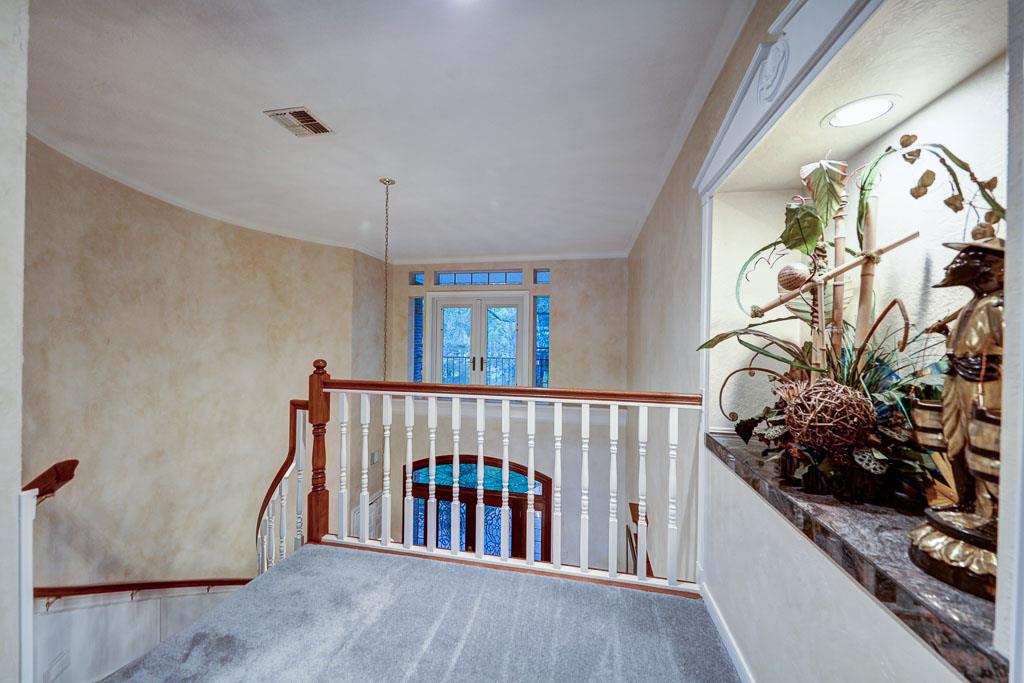
We said bye bye to this niche… and hello to gorgeous railing, chandelier, and American flag!

Upstairs Landing: After
When we decided to extend this second floor all the way to the windows we gained SO much space!

Gameroom: Before
We did have to decrease the size of the windows but that was a small sacrifice for all of this! Look at all the fun that can be had up here without disturbing the party on the first floor! We have shuffleboard, air hockey, and a poker table that converts to a regular table when needed.

Gameroom: After
This vinyl wallpaper is super durable and adds such an element of FUN!

Gameroom: After
Let’s head into what was previously a study, but we converted it into a bedroom…

Study: Before

Bedroom: After
Most people tell me that this is their favorite bedroom, and it’s not hard to see why! I used a vinyl wallpaper on the bed wall that has a wood texture and print, wall to wall seagrass carpet, and lots of navy and red.

Bedroom: After
We came up with names for all of the bedrooms, and we lovingly refer to this one as the “pin-up room” because of these sun-bathing beauties!

Bedroom: After

Bedroom: After
Here’s another one of the bedrooms…

Bedroom: Before
This room features fish drapes, a “wave” pattern on the wallpaper, and a lime green rattan headboard!

Bedroom: After
The orange dresser is carved with fish as well! I just love the playful colors in this room.

Bedroom: After

Bedroom: After
Another bedroom…

Bedroom: Before
Most clients would look at wallpaper with pineapples on it and say, “Nope!” and wonder if I’m a little bit crazy! While it’s true, I am a little crazy, I can’t tell you how much it means to me when clients trust me, even when my ideas sound a little out there! I LOVE how this room turned out, and I LOVE the pineapples.

Bedroom: After

Bedroom: After
The last bedroom…

Bedroom: Before
We went with a plaid wallpaper here, a rustic bed, and blue lacquered nightstands!

Bedroom: After

Bedroom: After
When you’re relaxing at the lake, do you want to be reminded that you should probably lift some weights or get your butt on a treadmill?! No! The answer is NO!

Gym: Before
You’d rather lay on this gigantic sectional and watch a movie!
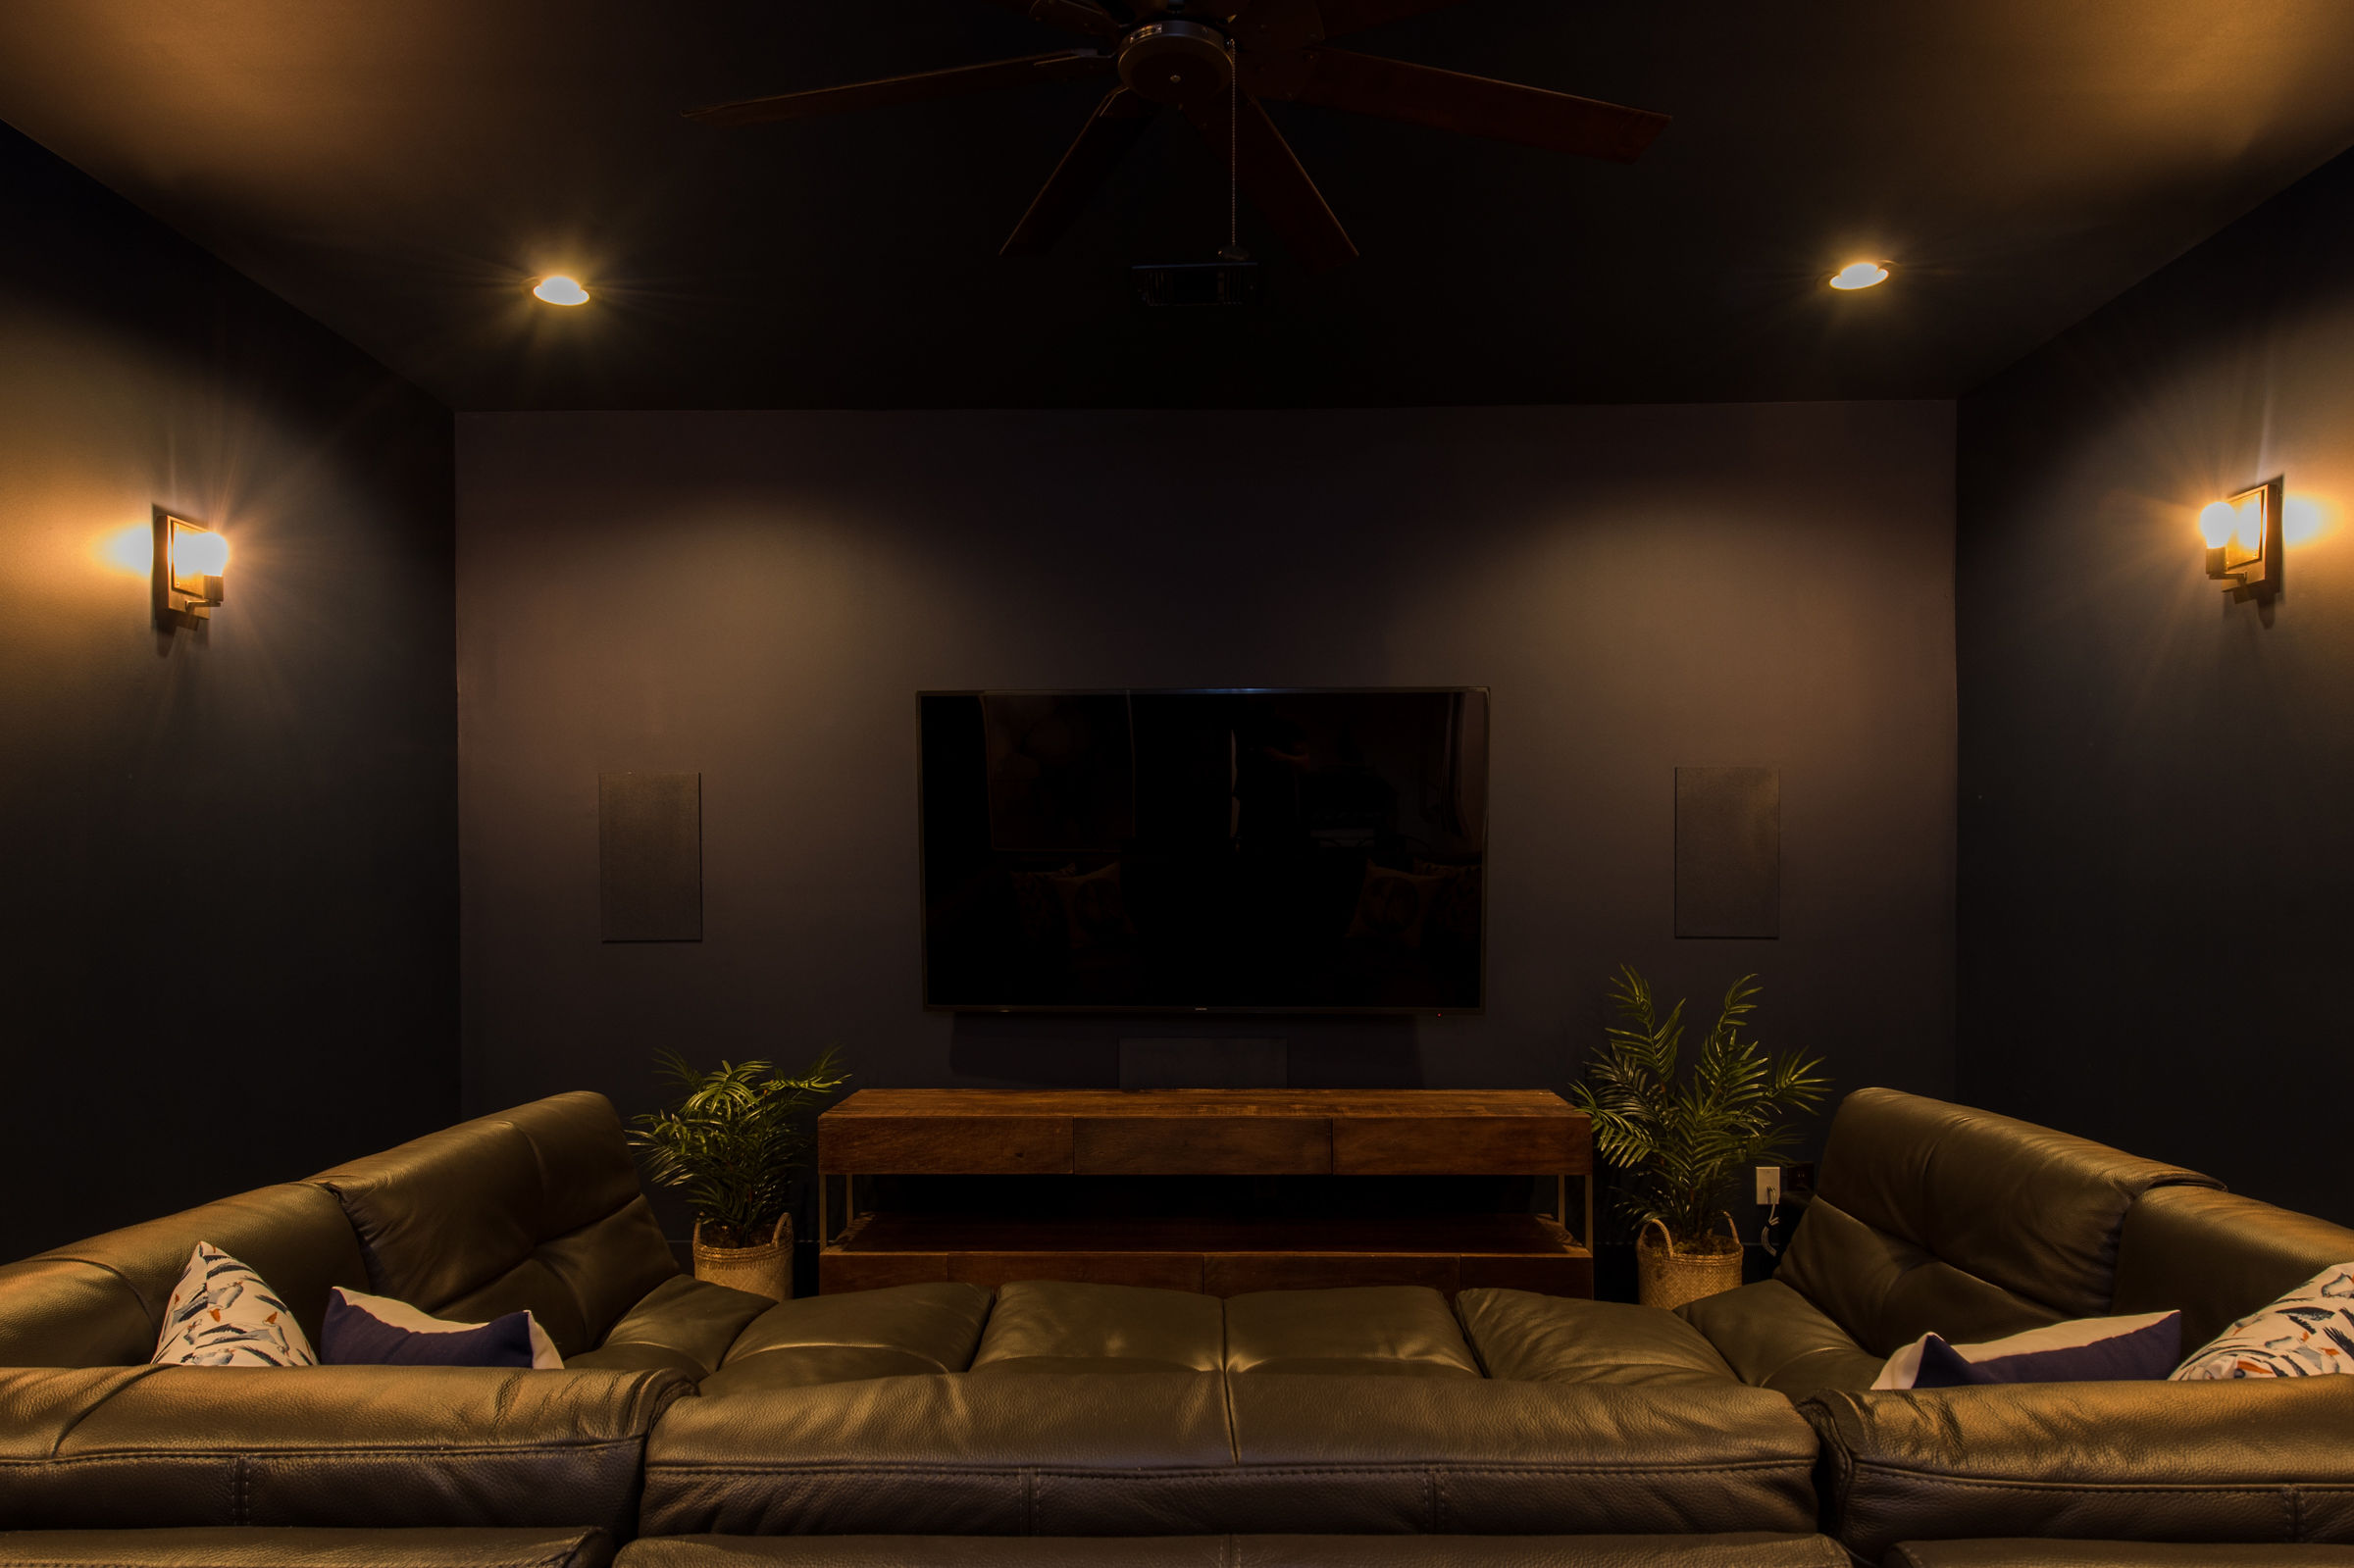
Theater: After
We painted the walls and ceilings in here navy and got the most comfy sectional ever! This also doubles as a place for kids to sleep.

Theater: After
Across from the theater is the most adorable bunk room ever. This was going to be a closet and, right at the end, my clients opted for a bunk room. I’m so glad they did!!

Bunk Room: After
I love that everyone has a book light/night light and a curtain. The bunks are open underneath for suitcases that can be easily stowed. The anchors on the walls are easily removable decals.

Bunk Room: After
I hope you enjoyed this home tour! This project was a long time in the making and a huge collaborative effort! Thank you to my team who helped me pull this off! What is your favorite aspect of this house?! Which bedroom is your favorite? We’d love to hear from you! If you missed the video of this house click here!